Taking time to plan and design your tiny home can save you big bucks on your build, plus let you get to customize however you please.
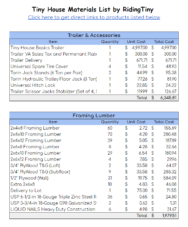
Get our FREE tiny house materials list to help estimate costs of your tiny home.
By entering your email address you agree to receive emails from Riding Tiny. We’ll respect your privacy and you can unsubscribe at any time.
Tiny House Weatherproofing 101: Housewrap, Windows, and Doors
- By Sang Kim
- Updated:
Installing windows and doors marks the beginning of weatherproofing your home. In this chapter, we explore how to install a window and a door to properly weatherproof your home against all kinds of weather.
Table of Contents
Materials and Tools You Need
- Housewrap – 9′ x 150′
- Round Plastic Cap Nails
- Tyvek Sheathing Tape
- Entry Door Inswing (32-in x 80-in)
- Keypad and Electronic Deadbolt
- Door Handle
- Awning Vinyl Window – 32 in. x 24 in.
- Left-Hand Vinyl Windows – 23.5 in. x 23.5 in.
- Left-Hand Vinyl Windows – 23.5 in. x 35.5 in.
- Left-Hand Sliding Vinyl Window – 47.5 in. x 23.5 in.
- Picture WIndow – 47.5 in. x 23.5 in.
- Right-Hand Sliding Window – 47.5 in. x 35.5 in.
- Right-Hand Sliding Window – 35.5 in. x 35.5 in.
- Windows and Door Flashing 6″ x 75′
- Windows and Door Fashing 4″ x 75′
- Silicone Caulking
- Gaps & Cracks For W&D
- Shims
How to Install Housewrapping

Before we start installing windows and doors, we must attach housewrapping to our walls. Housewrap is a synthetic weather-resistant barrier that prevents rain from entering into the wall assembly while allowing water vapor to pass through the exterior.
Housewrap is installed in between exterior siding and wall sheathing, and help prevent mold growth and air infiltration in the wall assembly.
You can’t prevent air and moisture infiltration in its entirety – it is just impossible to perfectly shield a home against all elements. However, proper installation of house-wrap can resist a bulk of rain, air, and moisture infiltration into your home
Step 1: Wrap the lower portion of your house with housewrap.
To properly housewrap your home, start from the lower portion of your house. Most housewraps sold at big box stores come in 9′ rolls. Most tiny homes are 10′ tall or taller. Therefore, you will need to install housewrap to the remaining top portion of your home.
Step 2: Attach the housewrap to the sheathing.
When attaching the housewrap to the sheathing, use round cap nails and a hammer to attach housewrap to the sheathing. Secure the housewrap firmly in place by fastening it every 32” horizontally and vertically and along the edges.
Step 3: Wrap the top portion of your house with housewrap.
With bottom layer done, cut the housewrap to desired length for the top portion of your wall.Attach the top portion of the housewrap to the sheathing using round cap nails as before.
Step 4: Tape all seams where housewraps overlap.
Once the house is completely covered in housewrap, you can proceed to seal the seams using a Tyvek sheathing tape and a utility knife. This specialty tape is water-proof and prevents air and moisture infiltration into the walls at the seams.
How to Install a Window
After housewrapping your tiny home, you need to cut open the housewrap whenever there are openings in your wall assembly, such as windows and doors.
There are different variations of how to install a window. Always follow the instructions provided by the window manufacturer.
Note: When you install a window or a door, always think about shedding water away from the home and the openings. Water tend to accumulate on a horizontal surface, and standing water can potentially damage your home by rotting.
For my tiny home windows, I followed the instructions outlined in the video below. That being said, here are the steps you need to follow.
Step 1: Create a window opening
Find the edge of the window opening. Using a utility knife, cut back 1-1/2″ from the four edges, exposing the rough opening.
At four corners, make a 45 degrees cut around 1-1/2″. These will create flaps that we will later tape back after installing the window.
Step 2: Create a slope on top of the window sill
If water were ever to find its way behind the window, it will father around a horizontal surface. In our case, a window sill.To prevent standing water from rotting the window sill, you need to slope and flash (waterproof) the sill.
You can slope your sill when framing your window. Simply cut the cripple studs at an angle using a miter saw. That way, when the you attach the sill plate, that the back side of the sill is higher than the front size by 1/8″, creating a path for water to shed away from the sill.
Metabo 10-Inch Compound Miter Saw
If you click this link and make a purchase, we earn a commission at no additional cost to you.

Step 3: Flash the window sill and tape the sides.
For window flashing, we use a sticky, waterproof material that will prevent water from damaging the window sill. Flashing is flexible and will create a waterproof seal around the bottom of the sill.
Using a utility knife, cut a 9″ flexible flashing that is 12″ larger than the length of the window sill. The best part of using flexible flashing is that you can flash the entire window sill and its corners without making any cuts.
Peal off the release paper to expose sticky side of the flashing. Make sure the flashing is flush with the interior side of the rough sill.
Install from the middle then to each of the two corners. Make sure the flex tape stretches around the entire corners. Use a J-Roller to apply pressure to the flashing so that it’s properly adhered to the rough sill.
Finally, using a Tyvek tape, tape the housewrap to the exposed sides of the jambs (left and right side). Leave the top flap alone.
Step 4: Place the shims on the window sill
Place two wood shims on the bottom of the flashed sill and use heavy duty duct tape to adhere the shims to the sill. Place each of them 6″ away from the left and right corner. This will create a slight gap around the window opening to account for movement caused by the expansion and contraction of the wood.
Step 5: Attach the window to the rough opening
Apply a continuous sealant (100% silicone) around the back side of the window flanges (left, right, and top). Leave the bottom flange un-caulked to allow moisture and any standing water to pass through.
Push the window into the opening and check for level, square and plumb, using a 9″ torpedo level and/or a 4′ beam level.
If everything is right, fasten the window into place using galvanized roofing nails. Wipe away excess silicone using a paper towel that protrudes from the flanges.
Hot Tip: If you are working alone, use screws to temporarily hold the window in place while you level and plumb. This allows you to plumb and level the window by yourself.
Step 6: Apply straight flashing around the window flange
Proceed to adhere 4″ straight flashing on both left and right side of the windows flange. The straight flashing must be 6″ larger than the height of your window so the flashing can extend 3″ above and below the window.
Then, adhere 6″ straight flashing to the top part of the window flange. The straight flashing must be 9″ longer than the width of your window head. Use a J-Roller to apply pressure to the flashing so that it’s properly adhered.
6"x75' Vycor Flashing
If you click this link and make a purchase, we earn a commission at no additional cost to you.

Step 7: Insulate around the windows
Since shims will create 1/4″ gap between the window and the rough opening, you must insulate this gap using foam sealant specifically made for window and door insulation. Insulating this gap is important because it reduces draft and keeps your house energy efficient.
Allow the foam to expand and fill up the gap in its entirety. When the foam hardens, use a utility knife to remove the excess foam.
How to Install a Door
A nice entry door can dramatically change the looks of a tiny home. We recommend installing a pre-hung door for your tiny homes.
A pre-hung door is a door slab that already comes pre-cut and pre-made, and all you need to do install is level, plumb, and insulate.
As always, follow the installation guide provided by the manufacturer for proper installation. Door installation may vary slightly depending on the manufacturer. That being said, here are the steps to installing a pre-hung entry door in your tiny home.
Step 1: Creating a door opening
Find the edge of the door opening. Using a utility knife, cut back 1-1/2″ from the four edges.Using a Tyvek tape, tape the housewrap to the exposed sides. Leave the top flap alone.
Step 2: Flash the door sill
Flash the sill and its corners using 9″ flexible flashing. Make sure you have 12″ larger than the length of the door sill. This leaves 6″ of flashing on each side to allow proper flashing around the corners.
Use a J-Roller to apply pressure to the flashing so that it’s properly adhered to the door sill.
Step 3: Caulk the sill and the rough opening.
Once completely flashed, weatherproof the sill area by applying three equally-spaced, continuous beads of 100% waterproof silicone. Then, caulk the perimeter of the rough opening where the brick-molding will make contact using the same sealant.
Caulking prevents water from going past behind the rough opening and potentially causing damage. With all caulking done, you are now prepared to set the door in place.
Step 4: Set the door in place
Slowly place the door frame into the opening with the help of an assistant. Lift the unit up, slightly tilt it away from the opening, place the frame on the sill, tilt the entire structure back towards the opening.
Step 5: Level and plumb the jamb.
Slowly place the door frame into the opening with the help of an assistant. Lift the unit up, slightly tilt it away from the opening, place the frame on the sill, tilt the entire structure back towards the opening.
Partially drive 3 inch exterior grade screws in the center of pre-drilled hole locations on both jambs to temporarily hold the door in place. You will fully drive the screws into the framing once shimmed.
Check the jamb is straight and plumb using a 4′ box beam level.
4' Box Beam Level
If you click this link and make a purchase, we earn a commission at no additional cost to you.

Step 5: Place the shims on the hinge side of the jamb
Place wood shims above the location where you partially screwed. The purpose of shims is to allow the gap between the door and the frame to be equal all around the door.
Ensuring that the jamb is straight and plumb, fully drive 3 inch exterior grade screws into the hinge to the studs.
Step 6: Place the shims on the knob side of the jamb
Place wood shims above the location where you partially screwed. Ensuring that the jamb is straight and plumb, fully drive partially-driven screws into the hinge to the studs.
Step 7: Adjust the sill height
Once everything has been screwed into place. Check that the door is properly installed using the dollar bill test.
Simply, place a dollar bill over the door threshold and close the door. If everything is installed properly, as you pull the dollar bill there will only be a slight tension. If the dollar bill rips as you pull, then the sill is set too high. If there is no tension on the dollar bill, then the sill is too low.
To make adjustments, open the threshold and locate the screws inside. Then, tighten or loosen screws half a turn left or half a turn right respectively until the adjustment is complete.
Step 8: Insulate around the door frame
Once you check that the door opens and closes properly, it’s time to insulate the gaps around the door frame. Using foam insulation, spray around the entirety of the gaps making sure the foam completely fills the gap.
Wipe away excess insulation that gets onto the door assembly. Cut away parts of the shims that are protruded by using a utility knife.
Step 9: Install a doorknob and a deadbolt
For your door lock system, we opted for Electronic Keypad Deadbolt Door Lock and a door knob. This allows us to bypass using a key and it is super convenient.
Here is the video we referenced to install our system.
Traditional Electronic Keypad Deadbolt Door Lock
If you click this link and make a purchase, we earn a commission at no additional cost to you.

Frequently Ased Questions
Window costs will vary depending on its thermal efficiency and quality of finish. Windows will generally cost between $100 up to $500 per window.
It will be up to you to decide what types and styles of windows you will incorporate into your tiny home. But as a general rule of thumb, if the windows are within reach of normal activity, we suggest opting for operable windows (casement, sliding, awning) to enjoy greatest utility.
Although a lot of tiny home folks incorporate lots of windows into their tiny homes, this reduces thermal efficiency of your home. We suggest one or two windows on the first floor and one or two in the bedroom loft.
Yes! If you can acquire used windows for cheap or free (even better), you should repurpose them as long as you don’t see any major defects.

Sang Kim is the founder of Riding Tiny® and has been active in the tiny house scene since 2018. Since then, his mission is to help people plan and build their dream tiny homes. And each year, he continues to help more people on the path to simple living and financial independence. Follow Sang's journey @ridingtiny
Sang Kim is the founder of Riding Tiny® and has been active in the tiny house scene since 2018. Since then, his mission is to help people plan and build their dream tiny homes. And each year, he continues to help more people on the path to simple living and financial independence. Follow Sang's journey @ridingtiny
Get our FREE tiny house materials list to help estimate costs of your tiny home.
By entering your email address you agree to receive emails from Riding Tiny. We’ll respect your privacy and you can unsubscribe at any time.
Recommended Reading
Do you need help choosing the best tiny home trailer for your tiny home? We’re here to help you decide on your tiny home trailer.
A stable foundation ensures a strong tiny home. Let’s learn what goes into making a sturdy tiny foundation!
The tiny house movement is here to stay. Learn everything you need to know about living in a smaller home.
Learn how to build a tiny house on wheels from scratch, step-by-step! Here, are all the resources you need to build yourself a tiny house.
How do you wire tiny house electrical? In this post, you will everything from tiny house electrical basics to wiring your home step-by-step.